
Have we ever tried to play our drums in an open space? It can be really tough. We have the sound of all the other instruments, plus people talking and traffic outside. The drum shield is a great way to keep these sounds out to focus on what’s important – our music! This article explores step by step-by-step on how to make a drum shield DIY.
But first you will need to gather some materials to start building your own Drum Shield.
How To Make A Drum Shield DIY
Materials Needed:
- 2 pieces of wood (one should be at least 1 inch by 12 inches)
- 2 x 4 feet of Plexiglass, 1/4 inch thick
- Acoustic foam (better yet, if I can find it – use Rockwool)
- Fabric to cover the drum shield DIY
- 1 sheet of plywood (at least 3/4 inches thick and 12×12 inches)
- Paint or stain
- Nails, screws, and drill
- Optional: lots of sandpaper
- PVC Pipe Glue (If not using hot glue)
Step One: Prepare My Work Area
I have to ensure that I have a large, clean surface to work on. Lay down some newspaper or plastic sheeting to protect the surface from any glue spills and cuts with a box cutter where necessary.
Put together all of my materials in a toolbox. It’s a good idea to keep a list of the tools and what I will need for each step so that I don’t get behind when it comes time to do some actual cutting!
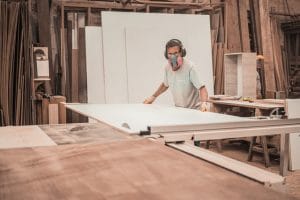
Step Two: Cut Plexiglass
Use a ruler with the marker to mark my plexiglass. Hold the ruler and press it firmly against the edge of the plexiglass and make a light, accurate line with my marker along the entire length of the marked section.
As I can see in this picture, we marked our three sections. We need two pieces at least 12 x12 inches each and one piece at least 1 inch by 12 inches long.
Then use either a jigsaw or coping saw to cut out each section as close as possible to that line without touching it! I may have to do some fine-tuning on my edge if there are any major gaps due to cutting errors. Repeat steps 2-4 for the second sheet of plexiglass. Try to keep the cuts as clean and accurate as possible; it will make life much easier later on!
Step Three: Glue Plexiglass Together
Once I have all of my cuts made, grab some sandpaper and smooth out any jagged edges or “saw marks” on both sides of each cut section. If I want to use a drum shield DIY with a round top, now is the time to mark where I need to drill a hole in either corner for my PVC pipe.
Make sure that the pieces fit together nice and tightly, then apply glue generously along one edge of one piece and lay that against another piece, sandwiching it between them. Now I take my C-clamp and tighten it down as much as possible, making sure that the pieces are lined up correctly (with half on each side of the C-clamp). Then let it dry overnight.
[Related Article: How To Soundproof Drum Room Cheaply?]
Step Four: Fitting Plexiglass to Plywood

Now cut, I cut my plywood so that it is slightly larger than 12×12 inches. Apply glue generously around the edge where I made my previous cuts and place it down with another piece of wood on top to sandwich them together. If I want a drum shield DIY with a round top, now is the time to drill holes for my PVC pipe in either corner.
Make sure that everything fits nice and tightly, then apply glue generously along one edge of one piece and lay that against another piece, sandwiching it between them. Go ahead and apply the glue to the top pieces of plywood (I will need two) and then place them down over my plexiglass, sandwiching the four pieces together.
Now take my C-clamp and tighten it down as much as I can. Make sure that the bottom is lined up correctly (with half on each side of the C-clamp). Then let it dry overnight and repeat this process for both sides.
Step Five: Cutting Fabric for Drum Shield DIY
This part can be a little bit tricky, but once I get used to doing it, it’s pretty easy. First, make sure all of my Plexiglass components are stuck firmly in place on top of my wood base.
Lay my fabric out on a flat surface and straighten it as best I can. Then put my Plexiglass pieces down carefully with the fabric sandwiched between them. Make sure that everything is lined up properly before I start cutting! Use a sharp pair of scissors or a box cutter to cut both layers at once, then pull them apart from each other and cut along the same line again but only on one piece of fabric.
I may need to try this step a few times before getting a feel for where exactly I need to make my cuts to get the most accurate measurements possible.
Now fold the fabric over plywood edges and staple it into place every few inches all the way around. I recommend using a heavy-duty stapler for this part as the fabric is thicker and may require a little extra oomph! Once that’s done, reattach my Plexiglass top by screwing it back into place from underneath with some Phillips-head screws.
Step Six: Attach Acoustic Foam to Drum Shield

I grab my acoustic foam and use either spray adhesive or hot glue to adhere it to the centre of each plywood side of my drum shield DIY. I ensure I have enough so that there are no gaps between pieces but don’t go overboard because it will be hard to keep in place while attaching other layers.
If I am using hot glue, use something metal like a clothes hanger to hold everything together while it dries. I can use clamps or anything else I might have around the house that will hold it in place.
Step Seven: Attaching Black Felt To Drum Shield
Now I take my black felt and cut two pieces to fit perfectly onto the top of my drum shield DIY. I find this is easiest with one long piece measuring all the way across, followed by another piece for each side section (12×12 inches). Then attach them using spray adhesive or hot glue!
Once again, if I am using hot glue, use something metal like a clothes hanger to hold everything together while it dries. I can use clamps or anything else I might have around the house that will hold it in place.
[Related Article: 10 Best Soundproof Curtains for Your Sanity(Buying Guide)]
Step Eight: Attaching Drum Shield to Hardware
The drum shield DIY is almost finished! All I have to do now is attach the hardware onto its back so that my drummer can easily take it on and off. I will need one eye screw measuring 1/2 inch long (a little longer won’t hurt either) for each side of my drum shield DIY. Drill pilot holes through plywood corners, then flip over and drill them out again from the front.
Now screw in the eye screws securely into place with a Philips head screwdriver or an electric drill with a Phillips-head bit! For example’s sake, I flipped my drum shield over upside down before attaching these, but it doesn’t matter which way they are facing if I use this method!
Step Nine: Drum Shield DIY Ready to Use!

Now that my drum shield DIY is finished, all I have to do is bring it over to my drummer’s kit and watch them play. Don’t forget to test it out first before giving it to them so that I can figure out the best height for their set-up!
If you feel that making it from start till the end is too technical and difficult for you, you can consider getting a ready-made one here.