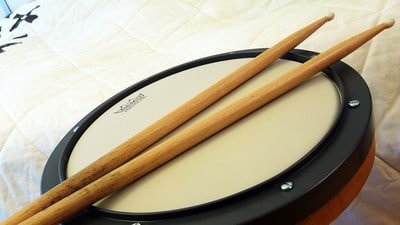
Drummers often need to practice their drumming skills, and one method used is practicing with a bass pedal. A bass pedal allows me to play the drums using my feet instead of my hands.
The problem with this is that it can be hard to find room for both the drum set and the bass pedals in my house. To solve this issue, we will show how to make a bass pedal practice rig DIY.
How To Make A Bass Pedal Practice Rig
Materials
- 8′ x 4′ sheet of plywood
- Some wheels if desired
- 2x4s for framing, screws or bolts
- Circular saw Table saw
- Drill
- Sander
- Carpenter’s square
- C clamp
- T clamp
- Stud finder
- Paintbrush
- Staining pad (for ease)
Step 1: Build a box for my bass

First, I need to measure the length and width of the bottom of my case. I can do this easily by putting the bass in the case without the neck and measuring up from one end. The depth will vary somewhat depending on how much room I want to build onto my box; I add 5 inches to my depth measurement, but that’s because I like a lot of clearance for my knee (I like to stand).
I will need to choose the length of my side pieces using the same method described above. I decided to have mine come out 4″ on each side since it doesn’t take much room and will support my pedals.
Step 2: Cut all wood to size

Use a circular saw for this part if I have one, and measure carefully to ensure my pieces are cut the right size. A table saw isn’t necessary for this unless I feel like working out! Just use a circular saw and miter/table saw to save some time and energy.
Step 3: Build The Box Structure
Now that all wood is cut, it’s time to build the box structure. I made my box 4′ high. This provides plenty of room for my pedals, but it’s also low enough to the ground that I can carry it with one hand if needed.
Use a carpenter’s square to make sure the pieces are flush and level before screwing them together. The screws should be evenly spaced about 2 inches apart all around, which will make the box very sturdy.
There are several ways to finish my box, but in this case, I simply stained it with a deck stain and sealed it with polyurethane. I can also spend lots of time building in decorative molding or accents if I want to! It’s up to me to decide how much effort I want to put in.
Step 4: Mount the pedals
After the box is built, it’s time to mount all of my pedals. I simply attached mine with screws or bolts through the bottom corners of my box.
I don’t want to drill large holes in the top because this will weaken the structure of the entire thing. Tape pedals in place if necessary for easier installation later. Additionally, I can use a circular saw to cut out a design in the bottom of my box if desired.
This will allow pedals to drop down and extend over the edge, which might be more or less convenient depending on my preferences. I will want to measure and mark carefully so that they line up with the pedal’s footswitch when it is in place. This is a good place to use my drill and T-clamps because these holes need to be exact.
Step 5: Wiring Up The Cords
After I have mounted all of my pedals, it’s time for the fun part: wiring up all of my cords. Use masking tape and label each cord according to which pedal it goes to.
This will save tons of time later on! I simply ran all of the cords under the pedal board to keep everything neat. Next, drill some screws or bolts through the box to secure my power supply, so it doesn’t slip out easily.
I can also use duct tape around the box if needed for extra support. Choose which surface I want to mount my bass on and assemble it with the same screws/bolts used for my pedals.
I can make this as much or as little like a regular pedal board as I would like; be sure to follow the spacing guidelines printed on each of my pedals if they have them (for instance: Ibanez pedals require at least 1 inch of space on all sides).
Additionally, make sure the surface is level, or my pedals won’t work correctly. Finally, put it all together! Put my pedal board on top of the box I made. I used 1×4 deck boards to make a railing/divider for my cases below, but this isn’t necessary if I prefer it open. Make sure everything works before I close up the case.
For mine, I simply attached two pieces of 2″ x 4″, laid them flat inside my box, and screwed them into the box top. This holds the neck very securely in place but can allow easy removal for storage or transportation if need be.
In addition to this, I attached two more 2″ x 4″ pieces to the back of my box for extra support. I added wheels to the bottom by simply drilling holes in each corner and screwing in some inexpensive casters. This makes it easy to move if needed, but I can leave it on a table or at a spot that works for me.
Step 6: Buying and installing effects

I went with a simple Boss CS-3 Compression pedal, which cuts the low end of the signal out of my bass before it hits my amplifier, making all notes easier to hear. It also adds some volume and sustain without affecting tone too much. Next up, I have a Boss EQ pedal which gives me more control over my tone, so I can get it sounding just right.
I also decided to go with a Demeter Compulator, which is essentially the opposite of the CS-3 in that it boosts low frequencies while cutting highs. My amp can cut out some of the lows when turned up, and placing this pedal in front of it helps to give my tone a little more definition and power.
The only problem with this is that I need to remember not to increase the volume on my bass anymore, or else it will sound very strange.
The various steps which have been highlighted are very critical because they come up with a critical point of emphasis, which ensures that the given output that is required is achieved in the long run. Music is a very intergral part of any given social domain.
Thus, having in place critical and analytical systems plays a pivotal part in the process of coming up with an articulated structure that can improve the process of coming up with a unique instrument that improves the overall situation.
Now I have a fully functional pedal practice rig. I recommend adding wheel pads if I want to practice outside, but if not, wheel cups will offer plenty of protection for my floor.
I can use this same type of box design for several different things; it’s great for housing a drum set or amps, and many people even build amplifiers into them (which is what I plan on doing with my next one). There are also other creative ways to make a pedal practice rig like the one below.