
Unlike acoustic drums, it is incredibly easy and quick to record electronic drums. You can do it for practice sessions or professional productions. Either way, there are a variety of ways of electronic drum recording.
What Are Some Benefits of recording with electronic drums
- No need for microphones
- The recording room/ space does not matter
- You only need one channel MIDI interface to your PC
- After recording, you can carry your MIDI notes in an audio workstation software
- Excellent record quality
- Now, here is how to record electric drums:
- There are two primary options for recording electronic drums:
- Audio recording
- MIDI recording
Recording Audio with Electronic Drums
You have two main ways to record your audio from an electronic kit:
- Using a USB cable
- Using an audio interface
Option 1: How to Record Audio Via USB
It is the simplest method to record audio because most modern drum modules have a USB port.
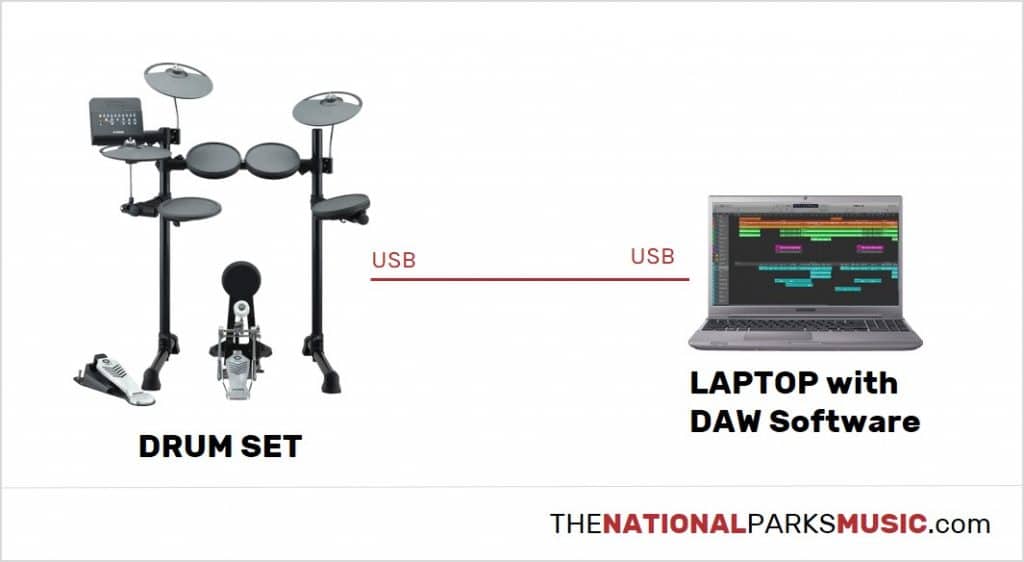
All the cymbals and pads on your electronic kit connect to the drum module. The module is the one that creates drum sounds. It is for this reason that some high-end drum modules also serve as the drum’s interface.
As such, you only need a USB cable to connect your drum set into your DAW.
What you need:
1. A computer
You don’t need fancy computers to record audio. However, make sure that it meets the necessary system requirements for an audio interface.
For instance, the minimum recommendations for Sonar include:
- USB port
- Intel i5 processor
- 500 MB hard drive
- Headphone jack, with headphones
- Speakers – internal or external
A standard PC for Windows, Linux, or Mac operating systems can meet these requirements. They are essential in recording and producing.
2. A recording software or a Digital Audio Workstation Software (DAW)
You can use free audio software such as Garageband (Mac) or Audacity (Mac, Windows, Linux). Check if you have one that is already installed.
Alternatively, you can use a professional DAW. This software differs on many computers. For instance, if you are using Windows, some of the popular DAW software are Avid Pro Tools, Cakewalk Sonar X3 and Image-Line FL Studio.
For Mac users, the most recommendable DAW is Apple Logic Pro. It comes with a variety of built-in options for drum synths.
If your DAW does not have a drum synth, make sure you buy a separate Addictive Drum. You can purchase a DAW or use the available free versions.
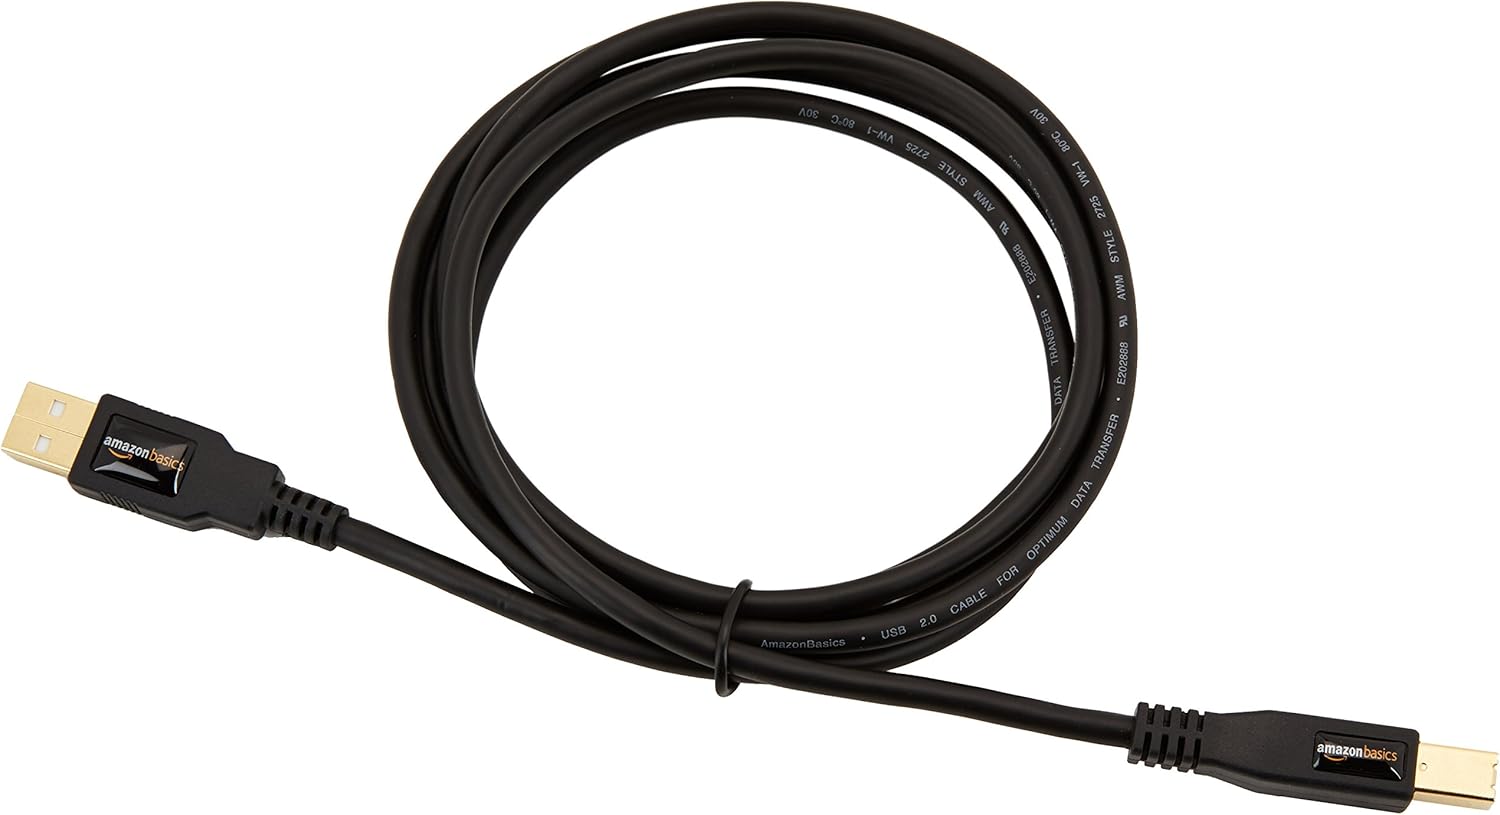
3. USB cable (USB A to USB B connector type)
This cable is similar to the one used for scanners, printers and digital hard drives. It is compatible with Macbooks and PCs. Most Roland V-Drums use such cables.
For example this:
4. Electronic drum kit with a USB port
When purchasing an electric kit for recording, it is recommendable to choose mesh head drums. They have a better feel and sensitivity as compared to rubber.
Step-by-step process on how to record:
- Switch on your computer
- Connect your drum set to the computers using a USB cable
- Connect all the required drivers that allow the computer to recognize the drum set
- Open the DAW software.
- Follow the audio how-to-record instructions provided by the DAW. Most DAWs provide a similar process on how to record.
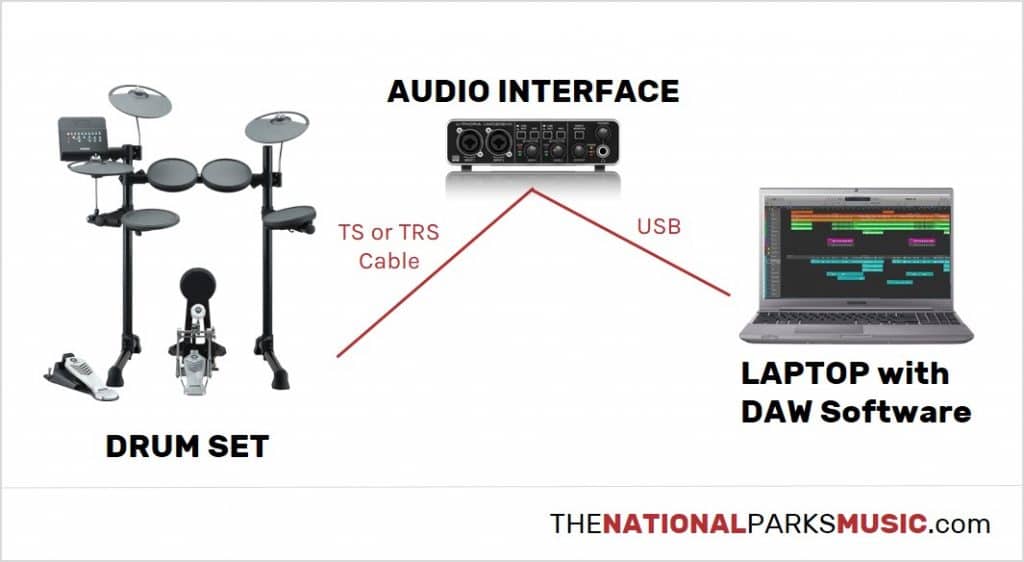
Option 2: How to record Audio Via an Audio Interface
If your drum set does not have a USB port, you can use an audio interface to connect it to your PC. Its significance is that it helps transmit digital signals into the computers for interpretation.
Drum modules come with audio outputs that help to record and in live performances.
You plug your drum module into the interface, which then connects to your PC using a USB. Consequently, the DAW can record and manipulate the sounds of your drums.
The interfaces come at different prices. Ensure that you buy an interface that is compatible with your computer’s operating system. This method is more expensive than the USB one, but it yields excellent results.
What you need:
1. A computer
Ensure that it meets all the system requirements of your interface.
2. A recording software or DAW
It is similar to how you record via USB, as discussed above.
3. An electric drum set
Ensure that your electronic drum kit is compatible with your audio interface. When buying a drum kit for recording, it is recommendable to go for one that has mesh head drum pads. They have a better feel and sensitivity as compared to rubber pads.
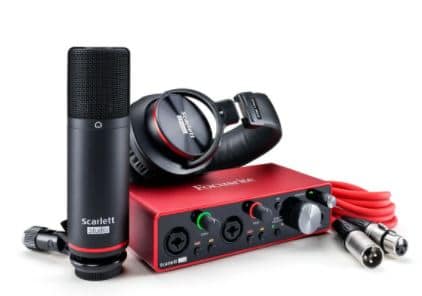
4. Audio interface
An audio interface is an important tool in the recording process. It connects to your computer drum via a USB.
When buying an interface, it is recommendable to invest a good amount of money for an excellent product. Third generation Focusrite Scarlette 2i2 is by far the most popular and recommendable interface. It has two outputs and two inputs.
5. Audio cables
The guidelines below are general and work for the majority of electric drum sets.
However, you can always consult your drum module’s manual or check the output connections on the back of the module.
If your module has two ¼ inch phone jack outputs, you need two ¼ inch TS cables (tip-sleeve). Then, connect the cables from the module to the interface.
If your module has only one stereo output, you should use a tip-ring-sleeve TRS cable instead of a TS cable.
For modules with one 1/8 inch output, you need to use a 1/8 inch to a ¼ inch TRS cable. You can also use a 1/8 inch to a ¼ inch adapter.
Recording process:
- Turn on your PC
- Connect the audio outputs from your drum module to the inputs on the audio interface via audio cables.
- Turn up the volume/ gain knob on the interface.
- Connect the interface’s USB output to your computer’s USB input
- On your computer, launch the DAW/ software.
- The audio/ DAW software will give you directions to record your audio. Be careful to follow all the instructions.
- Start drumming. As you drum, you will see a visual representation of audio waves. It is a representation of a continuous recording.
What Are Some Common Problems of Audio drums Recorder and How to solve Them
Getting latency/ lag during your audio record
It is usually the space in time between when you hit the drum and when the computer receives and processes the signal. If this happens, try the following troubleshooting methods:
- If you are listening to your audio output via the computer as it records, use headphones. Plug them into the headphone audio output on the drum module. Doing so eliminates any latency.
- If you are to record a song, dragging the recording back in the track will adjust any lag.
- If you are using a Windows operating system, configure your PC for working with audio.
- Try to reduce the I/O buffer size on the DAW preferences.
- If none of these works, refer to your drum user manual or manufacturer’s website for troubleshooting guidelines.
Your recording sounds distorted, has a hiss, or is too quiet.
- The input volume on your audio interface could be the problem. Too high volume distorts the sound while too low volume makes it incredibly quiet.
- Adjust the gain knob to try and get a reasonable signal. However, be careful not to compromise on audio quality.
- Electric signals from a charging laptop that has a working battery is another cause of hissing sound during recording. Try to disconnect the AC power to see if it works.
- Other peripherals connected such as USB and hard drives, tend to cause internal noise. Remove them and check if this makes a difference.
Your computer is not detecting the audio interface.
- First, ensure that the USB cable is plugged incorrectly.
- Ensure that all the recommended drivers as per the interface manual are successfully installed
- Ensure that the interface is compatible with your machine’s operating system
- If the above guidelines do not work, it could be that:
- The USB port on your laptop is broken.
- The audio interface has malfunctioned.
- Turning the computer off and then on can help solve the issue.
How to Record Drums Via MIDI
MIDI is another second major way of recording electronic drums after audio recording. It is a language used by computers to translate the sound made after hitting drum pads.
Recording MIDI, you don’t need to use the internal sounds of your drum set. MIDI allows you to trigger other virtual instruments in your DAW.
The best thing about using virtual instruments is that they sound far better than built-in sounds. It also gives you the privilege of changing drum sounds after you have recorded your track.
What you need:
1. A computer
2. Cable
- If your drum set module has a USB port, you will only need a USB cable (USB Type-A to USB Type B).
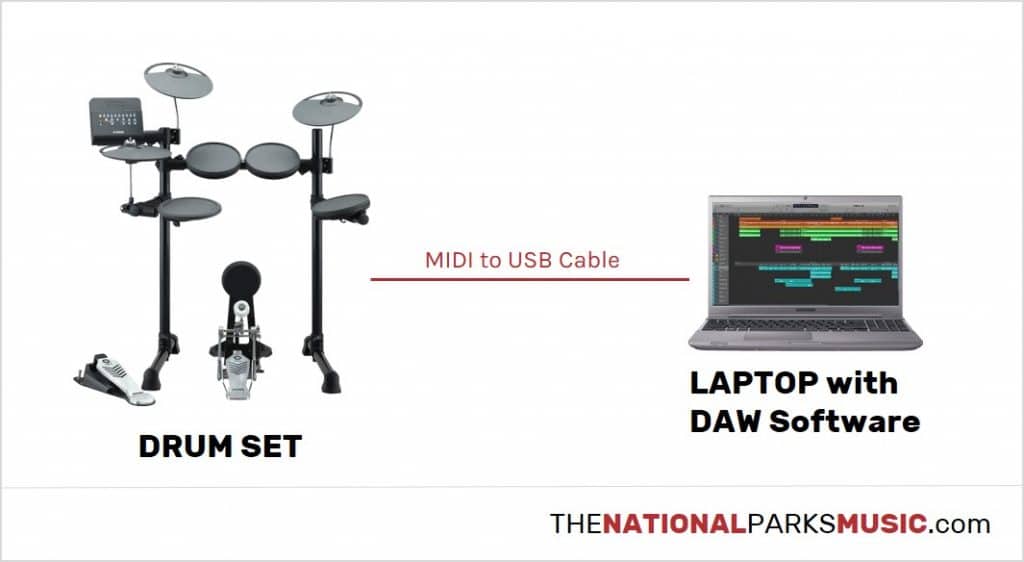
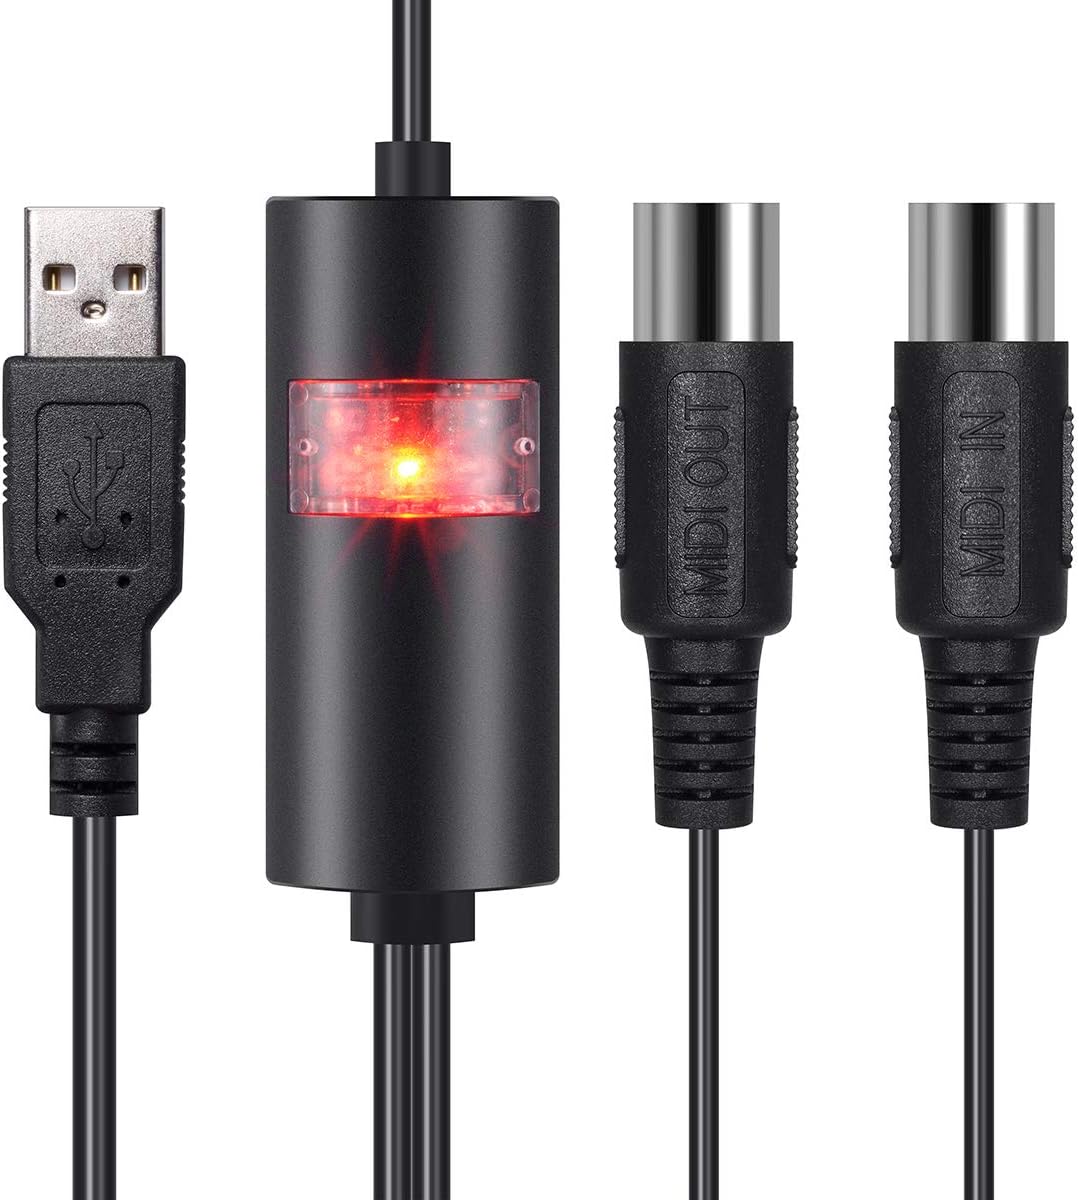
- If your drum module has a MIDI output port instead, you will need a MIDI to USB converter.
- If you have an audio interface that has a MIDI port, a MIDI to USB converter will still work.
· Virtual Drum Software (VST) or Digital Audio Station (DAW)
There are a variety of VSTs and drum software in the market. Some common examples are Toontrack EZ Drummer, Steven Slate Drums, Superior Drummer and Addictive Drums. You can either use these applications as plugins or as standalone.
If your electronic drum has neither MIDI nor USB port, unfortunately, it will not support MIDI connectivity.
Step-by-step process on how to record
- The first step is always turning on your computer
- Connect your electronic drum set to your computer using MIDI. Depending on your drum module, you can connect either through a USB cable, MIDI cable, or a MIDI-supported audio interface or MIDI to USB converter.
- Launch your DAW you are using. For a DAW software, create a new project and then create a MIDI instrument track.
- To map the MIDI notes to your choice’s sound, just follow the instructions of your recording software. In some cases, your software will map the drums for you automatically.
- Press “record.”
- Begin playing your drums.
Note that MIDI recording appearance will be different from that of an audio recording. As you play the drum kit, small dots/bars will appear on a grid. The small bars/dots represent the MIDI notes you are triggering as you strike the various elements of a drum kit.
After completing your recording, you can move the dots/bars around to change the performance or drum sounds. MIDI drums are, therefore, a bit more flexible than the traditional audio recording.
You can also align the MIDI performances to a grid that is linked to the metronome. Doing so makes them sound perfectly in time.
Frequently Asked Questions
How to Connect Electronic Drums to Computer
- Start by inserting the “IN” MIDI plug on the USB MIDI to the “OUT” MIDI port on your drum kit.
- Connect the USB plug of the USB MIDI cable to the USB port of your computer
- You can now turn on your drum module and your computer.
- To know that everything is working perfectly, you will see a red light on the USB MIDI cable. The yellow “IN” light will start blinking faintly and rapidly. The yellow light will become brighter anytime to strike any drum or cymbal.
However, the connection will slightly differ if you are using separate drums or a MIDI interface box. Here, you connect the MIDI output of your drum module to the MIDI input on the MIDI interface.
How to Connect Alesis Electronic Drums to Pc
The process is the same as above
How to Record Electric Drums on GarageBand
- On the system configuration, change the phone’s type of port to input.
- On the GarageBand settings, choose a real instrument. You should be able to record the sounds of your HD1.
- For recording MIDI, you will require a MIDI/USB cable. The cable will help connect the HD1’s MIDI out to you Mac’s USB port.
- In the GarageBand, you will need to choose an instrument that will playback the sounds.
- Do not forget that the HD1 lacks a MIDI in port. Therefore, you may not hear what you have recorded unless you select one instrument (drums).
How to Record Electric Drums on Audacity
All you need to do is to buy a USB interface that has a stereo line-in. Using the Device Toolbar, select your Audacity input.
How to Connect Electric Drums to Speakers
- Ensure your equipment is set on stage before making any connection. Set the speakers on the left and right side to avoid any interference from the microphones.
- On your drum kit’s module, look for output or headphones port. This port is what you will use to connect your drum kit to your speaker. If your output jack cannot take the ¼ inch cable, you can buy a converter. A converter will make it possible to use the normal ¼ inch cable.
- Plug one end of the ¼ inch cable into your drum kit’s module output and the other end into the input jack of your amplifier. Using another cable, connect the output of the amplifier to the input of the speaker.
- Ensure you turn all the volumes to zero, then plug your system to the power source and turn on. Increase the volume slowly as you test the drums until you get to your perfect sound level.
How to Record Electronic Drums on iPhone
Follow these three steps to do your recording:
- Start to record by tapping the red circle.
- After you are done, tap the red square to end your recording. This saves your recorded work automatically.
- To play your recording, tap new recording.
Conclusion
In conclusion, unlike acoustic drums, it is quite easy to record your electronic drums using your computer. You can choose between the two main methods available.
As you make your choice, understand that, just like for acoustic drums, the quality of each method will be different.
If you want to record for personal practice, audio recording may be the way to go. Its ease of use spares you from many challenges you may face.
However, if you want to record for professional use, you may opt for the MIDI recording. It will give you a more comprehensive sound that you adjust later. I believe this and other related posts have given you enough information.