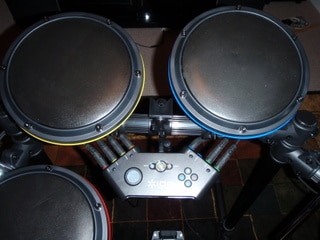
Having a good feel of an electric drum kit is priceless for any drummer or musician. You need to hear the snare response envisioned. What’s more, your hi-hat pad should produce just the right wash on the audio output device.
It’s critical to map your MIDI channel through the Roland drums hardware to your software instrument. This ensures that they sync well. You can also use an external drum controller to send specified MIDI notes for your electronic drum.
In this article, I will give you a definitive guide on mapping your drums for MIDI.
How To Assign MIDI Notes To Drum Pads
Your Roland MIDI note numbers are usually pre-assigned to each pad right from the factory. However, you can choose to have customized MIDI note number assignments through mapping preset.

When mapping your Roland electronic drum, the Steven Slate Drums virtual instruments do an exemplary job.With this, you will find MIDI sequencing or triggering of audio signals in an external MIDI device module more convenient.
Here is how to customize your Roland electronic drums for MIDI.
- Select the kit or internal sounds you want to edit
- Press the “OTHER” button
- Access the second set of buttons by pressing the cursor down button or the dropdown menu
- Press the MIDI NOTE (the function 3 button)
- Tap the pad that you intend to change or check the MIDI note assignment
- Select the Note number by turning the dial
- For any other remaining pad that you desire to change, repeat steps 5 and 6
- Once you are done, hit the DRUM KIT button. This action saves your new e-drum settings in the kit automatically.
Remember to shut off the power once you are done using your Roland drum kit. Make use of the physical power button in the kit to achieve this.
NOTE: If you use an external power source to switch off your kit, your custom settings will not be saved.
For note octave map preset, you can also choose to use an alternative MIDI trigger. This entails using an external drum controller.
You can use the drum controller to send specified MIDI notes for particular instruments.
Here is how to use this MIDI mapping method.
- Begin by activating the Use Hardware Controller Mapping. You will find this on the lower right side of the pad section.
At this stage, you can load, save and delete various note octaves configurations.
- Next, you need to specify new trigger notes for each pad.
- Right-click the pad, then hit the EDIT TRIGGER NOTE
Here, specify the trigger note you want. Then, in the value field, the new trigger note. Playing the corresponding note on the hardware controller can also help you to enter the new trigger note.
- Again, right-click a pad, then hit Trigger Notes followed by Assign Trigger Note. Then, on the submenus, select the new note.
Once you are done here, the groove agent will automatically jump to the next pad.
- Continue as you assign a MIDI note to all the drum pads you intend to. Once you are done, press the ENTER button to stop assigning.
From the Trigger Notes submenu, you can check all the musical notes that you have assigned.
What Is MIDI For Drums?
MIDI Drums offer an alternative to miking actual electronic drum kits. They offer a drummer multiple options of drum samples to choose from.
However, the major benefit that MIDI offers is the ability to edit drum tracks with just a few clicks of the mouse.
How Does MIDI Work With E-Drums?
On hitting the kick pedal in electronic drum sets, the ‘hit’ is picked by the piezo and converted into an electric audio signal.
The module then does two things: it interprets the signal then samples the variable snare articulation that you hear in your headphone output.
The interpreted signal is the MIDI note, whose identification is a number. For instance, 38 could be for the snare pad, 22 for the snare rim, and 36 for the bass drum.
The MIDI Signal also carries with it the velocity. This is the strength you used when hitting the drum pad. This also uses numbers ranging from 0-127 to represent them.
For instance, a value of 127 means that your hit the drum pad hard. On the other hand, a value of 50 means you hit the kick drum pad just lightly.
The module is also responsible for sending the MIDI information to the MIDI or USB output ports.
How Does The MIDI Note Travel To My PC?
To achieve this, start by connecting your e-drum module to your PC. There are three ways you can achieve this.
-
Using A MIDI-to-USB Cable
This cable is an adapter that runs from the MIDI plug to the USB interface. On one side, the cable contains one or two MIDI audio cables. The other side contains a USB connection cable.
One of the most popular MIDI-to-USB cables is the Roland MK-2.

-
Using The MIDI Interface
Another name for a MIDI interface is an external sound card. You connect it to your PC via a USB cable.
A MIDI interface requires a -MIDI input, which you will connect to the regular e-drums module using a MIDI cable.
Most often, a MIDI interface will also have Audio inputs for guitars and microphones.
I would highly recommend the Steinberg UR22 MK2 MIDI interface.

My friend has had an amazing experience using it to trigger sample software via an electronic drum kit.
-
Using A USB Cable
Some of Roland’s newer models, such as the Roland TD-11KV and TD-25, have both MIDI output and a direct USB port.
As such, you can connect the electronic drum module directly to your PC via a USB cable. In this case, the module acts as the MIDI interface. Most higher-end drum modules feature drum module inputs.
This one of the easiest methods since a USB cable is the only thing you need.
Can MIDI Drums Sound Real?
At times, it can be noticeable when you do not record live drums on a track. However, your drum sounds do not have to appear lacking.
All you need is the appropriate skills, the right mindset, and approach. With these, your MIDI drums can sound as good as any live drums.
Here are a few tips to help that will ensure your drums sound real:
-
Use Quality Samples Or VST’s
Use a high-quality VST together with great drum samples. These two will give you success in the whole process.
Some of the best VSTs include Addictive Drums and Superior Drummer.

-
Velocity
Velocity is the volume at which a certain note sounds. It is critical in ensuring your MIDI drum has a real acoustic sound like that produced by acoustic drums.
Velocity ranges from 0 to 127. You can use this to your advantage to avoid producing a boring sound.
-
Think Like A Drummer
A drummer cannot hit the tom, the snare, the integrated hi-hat cymbal pad, and the percussion all at once since he or she has only two hands. Consequently, avoid hitting all these at once.
Again, a drummer will not hit all the notes with the same strength. Likewise, you need to know how to trigger your drum rubber pads to achieve this.
-
Make Use of Groove
A DAW will always allow you to insert a groove into your track. Groove will help to change the velocity and the timing of your track.